+86 15093323284 hams@ailunce.com


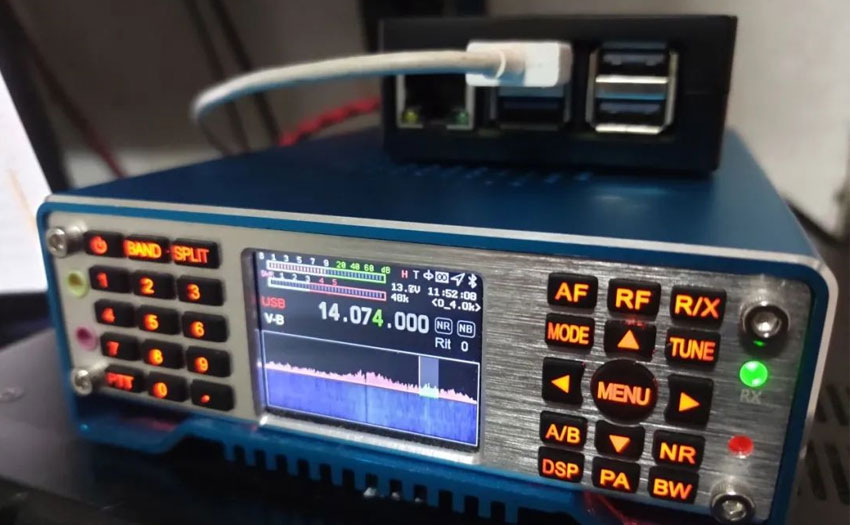
Raspberry Pi and AilunceHS2 can be perfectly adapted to pay FT8
Today let's listen to BG1JT who share his experience to play FT8. that is Use raspberry PI as WEBSDR server, and try to motinor with PI using SDR+GQRX.
In fact, as a relatively conservative DXer, I have always been somewhat resistant to the communication method of FT8. I always feel that there is no "soul" in the communication that can be done with just a few clicks of the mouse. However, with the continuous abuse of the electromagnetic environment in the city, the antenna installation has been frustrated everywhere. Gradually, I understood that, after all, there is a reason for existence.
So I gradually came into contact with FT8, it happens that the AilunceHS2 machine has a built-in sound card, which has certain advantages in convenience.
After in-depth understanding, I found that FT8 really only needs to move the mouse to complete the communication, so I started to think carefully. I directly chose the target and invested in the Raspberry Pi, and used the Raspberry Pi as the WEBSDR server. .I also tried to use PI to use SDR+GQRX for monitoring. Coupled with its extremely low power consumption, it is really the best choice. After trying, Raspberry Pi+AilunceHS2 can be perfectly adapted.

First prepare the hardware
1.Raspberry Pi 3B+ /4B+
2.TYPE-C data cable.
3.Micro-USB data cable.
4.TF card reader.
5.High speed TF card above 8G.
6.5V1A power supply is used to power the Raspberry Pi.
7.Then there is AilunceHS2 and power supply and antenna feed system.
First prepare the software
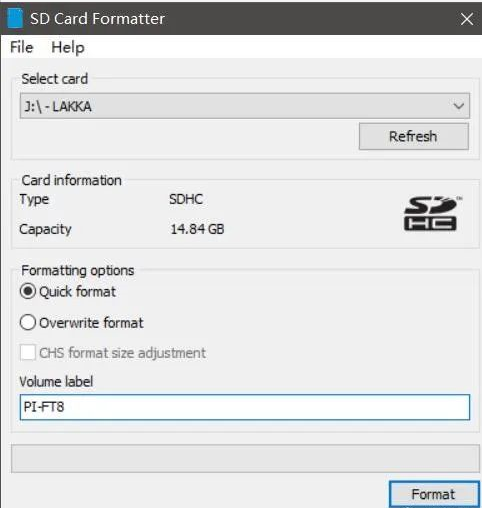
SD Card Formatter
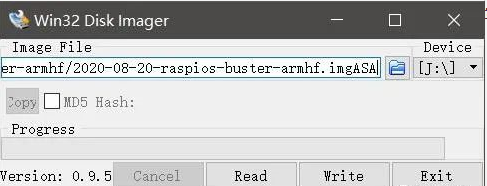
Win32DiskImager
Putty
Raspberry Pi operating system image
https://www.raspberrypi.org/software/operating-systems/
Download Raspberry Pi OS with desktop version
GridTracker-Linux-Arm
jtdx-2.2.0-rc152_u_armhf
phtunnel_5_0_rapi_armhf
system production
Use SD Card Formatter to format the TF card.
Flash the raspberry pi image into the TF card.
If you need to remotely control the Raspberry Pi, you need to make the following settings, if you directly control the Raspberry Pi, you can ignore it
Then don't pull out the TF card, we need to configure the Raspberry Pi.
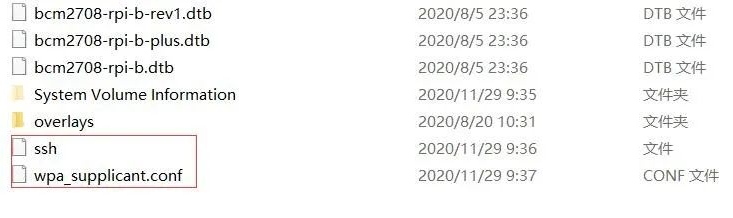
1. Turn on SSH control permissions
Create a text file named ssh on the boot root directory. Remember that this file has no extension. This is the permission to use the software to control the SSH command line.
2. Turn on WIFI
Create a text file named wpa_supplicant.conf in the Boot root directory, configure the wireless network (if you use a wired network, you can ignore it), enter the following text.
country=CN
ctrl_interface=DIR=/var/run/wpa_supplicant GROUP=netdev
update_config=1
network={
ssid="WIFI name"
psk="WIFI password"
key_mgmt=WPA-PSK
priority=1
After this We can insert the TF card into the Raspberry Pi and wait for the Raspberry Pi to start.
Go into your router to get the IP address of the raspberry PI.
Note: The following commands, if remote control, use “PUTTY’ to operate. If you directly control the Raspberry Pi, use the terminal of the Raspberry Pi to operate.
The default login for Raspberry Pi is
Username: Pi
Password: raspberry
First do system and related software upgrades.
sudo apt-get update
sudo pat-get upgrade
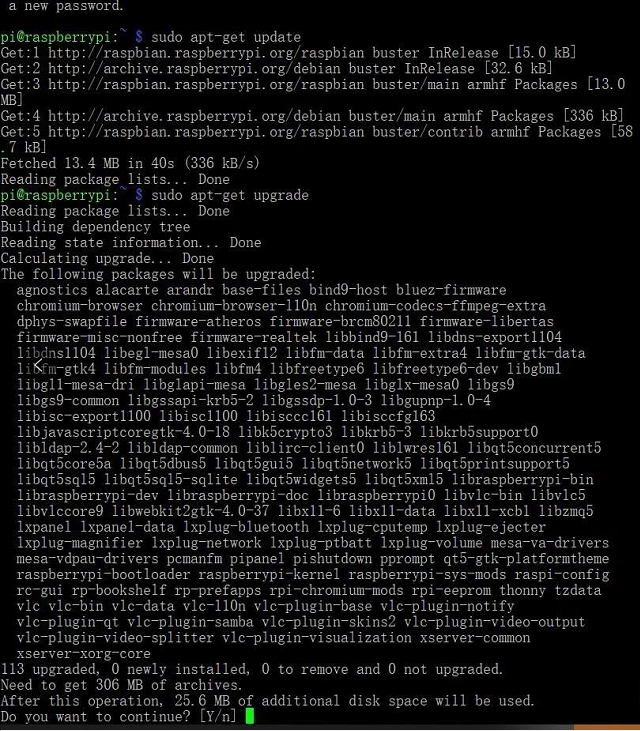
If asked whether to update, just Y.
Install remote control desktop (ignore if remote control is not needed)
sudo apt-get install xrdp
Restart after installation, use WINDOWS remote control, and enter.
Then copy the software package provided in this article to the Raspberry Pi with a USB flash drive, but be sure to pay attention to the path.

Then continue on the command line
Enter the FT8 directory
cd FT8
Install JTDX
sudo dpkg -i jtdx.deb
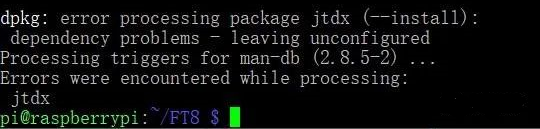
After running, an error may occur... This is because some of its related support packages cannot be installed automatically.
Complete the support package, and you will be done directly with Y.
sudo apt-get --fix-broken install

Then unzip GridTracker
tar -zxvf Gt.tar.gz
Then restart the Raspberry Pi
sudo reboot
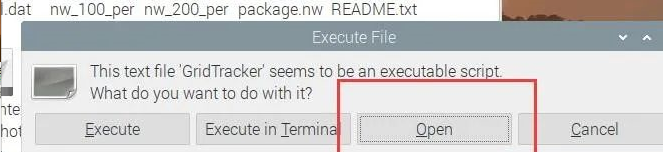
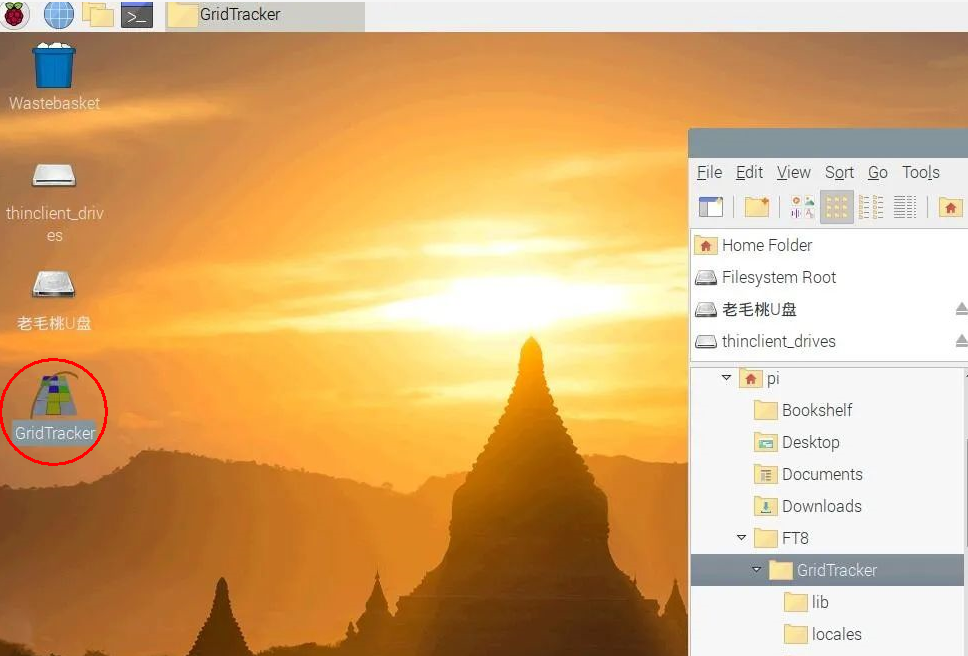
After restarting, find it on the desktop
GridTracker of PI/FT8 catalog
Then copy the GridTracker file in the directory to the desktop.

Double-click the mouse, the first time we want to configure, click OPEN.
Then change the content to the path in the red box as shown in the figure, this path should be consistent with GridTracker.
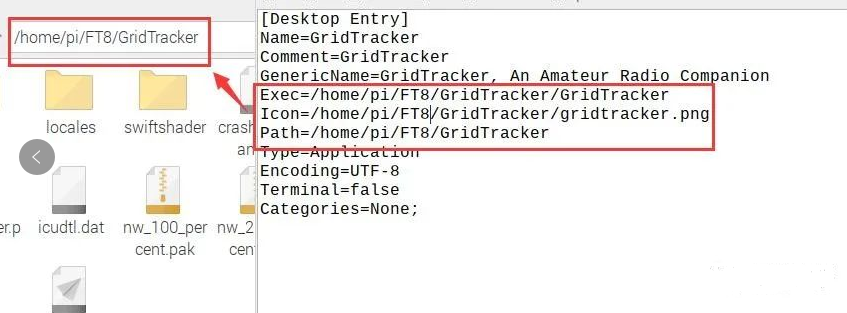
If the modification is correct, the picture will change:
Then double-click and select Execute to open the software.
We continue to configure JTDX, and then in the media of the start menu, we can see the JTDX software just installed, click to open.
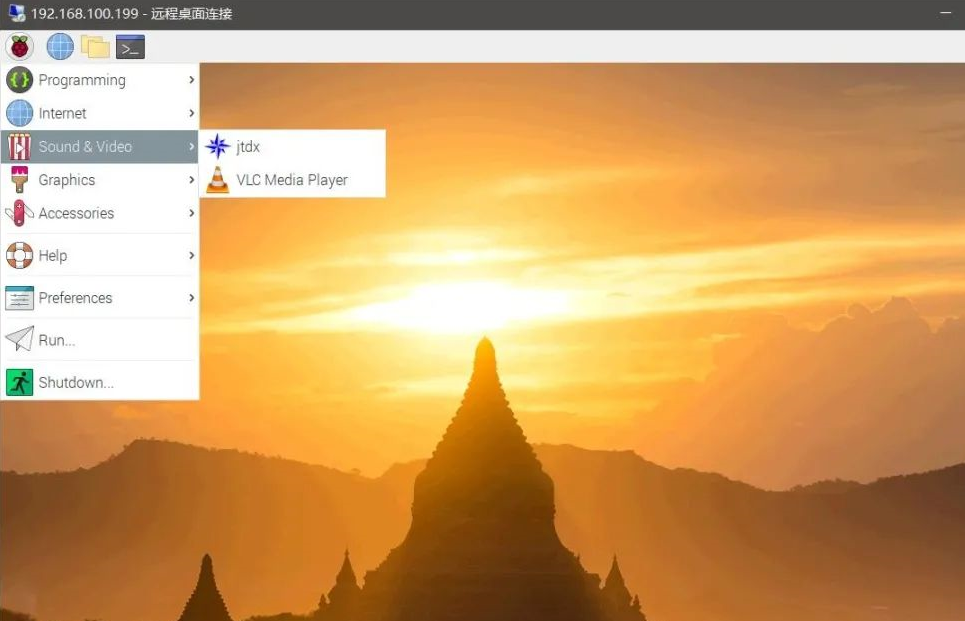
Open the software for the first time, because there is no configuration file, you will be prompted, just ok directly.

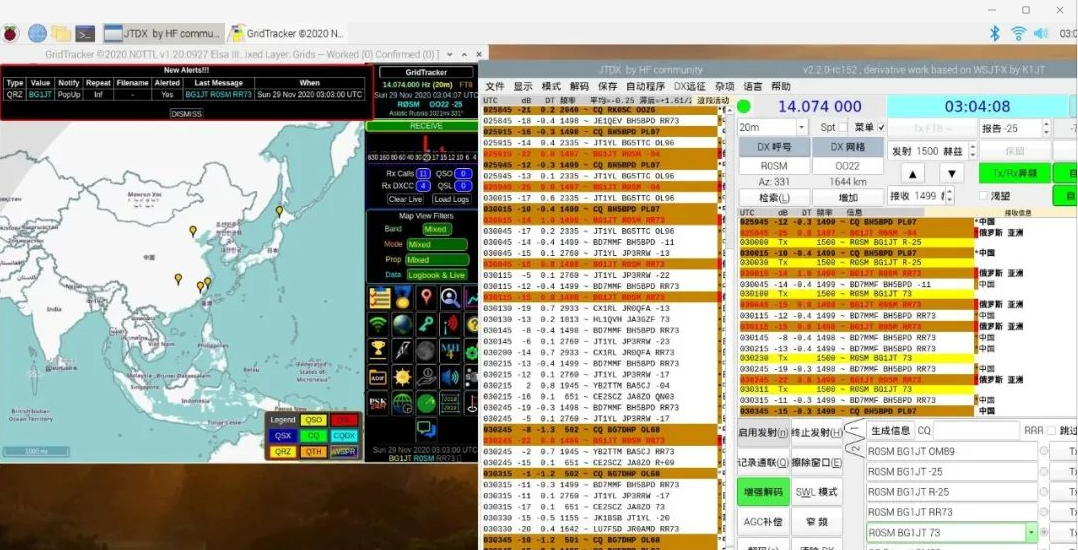
Then there is the normal configuration, callsign, grid, and IARU zone.
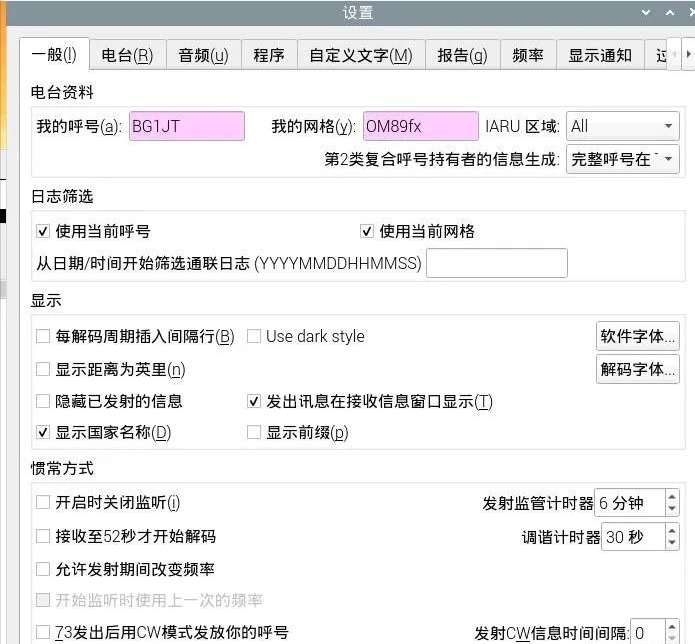
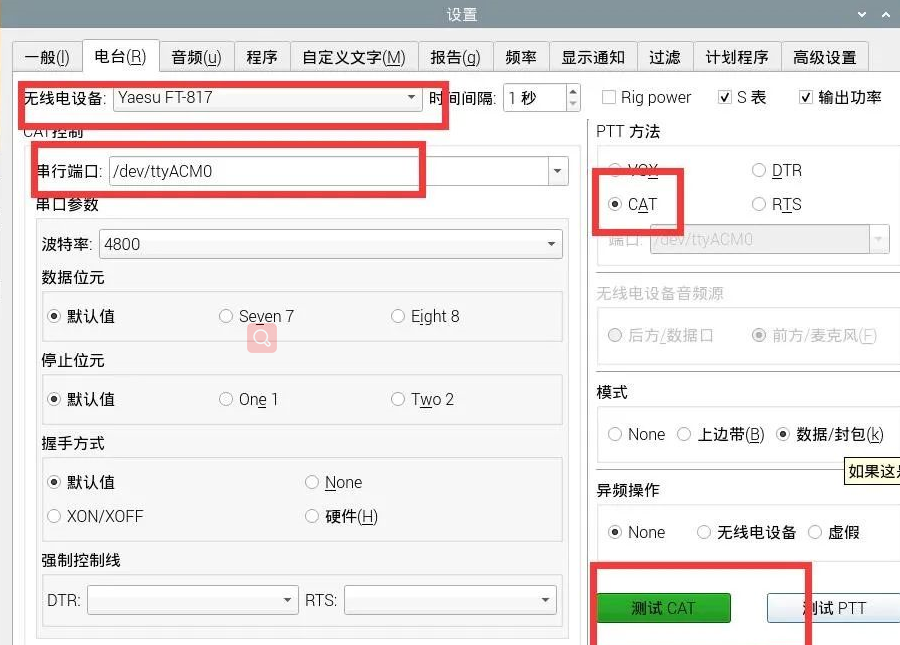

JTDX can work normally after the above configuration.It is basically the same as the PC terminal operation. Those who are familiar with FT8 can get started directly.
Get the software which contented in this article.