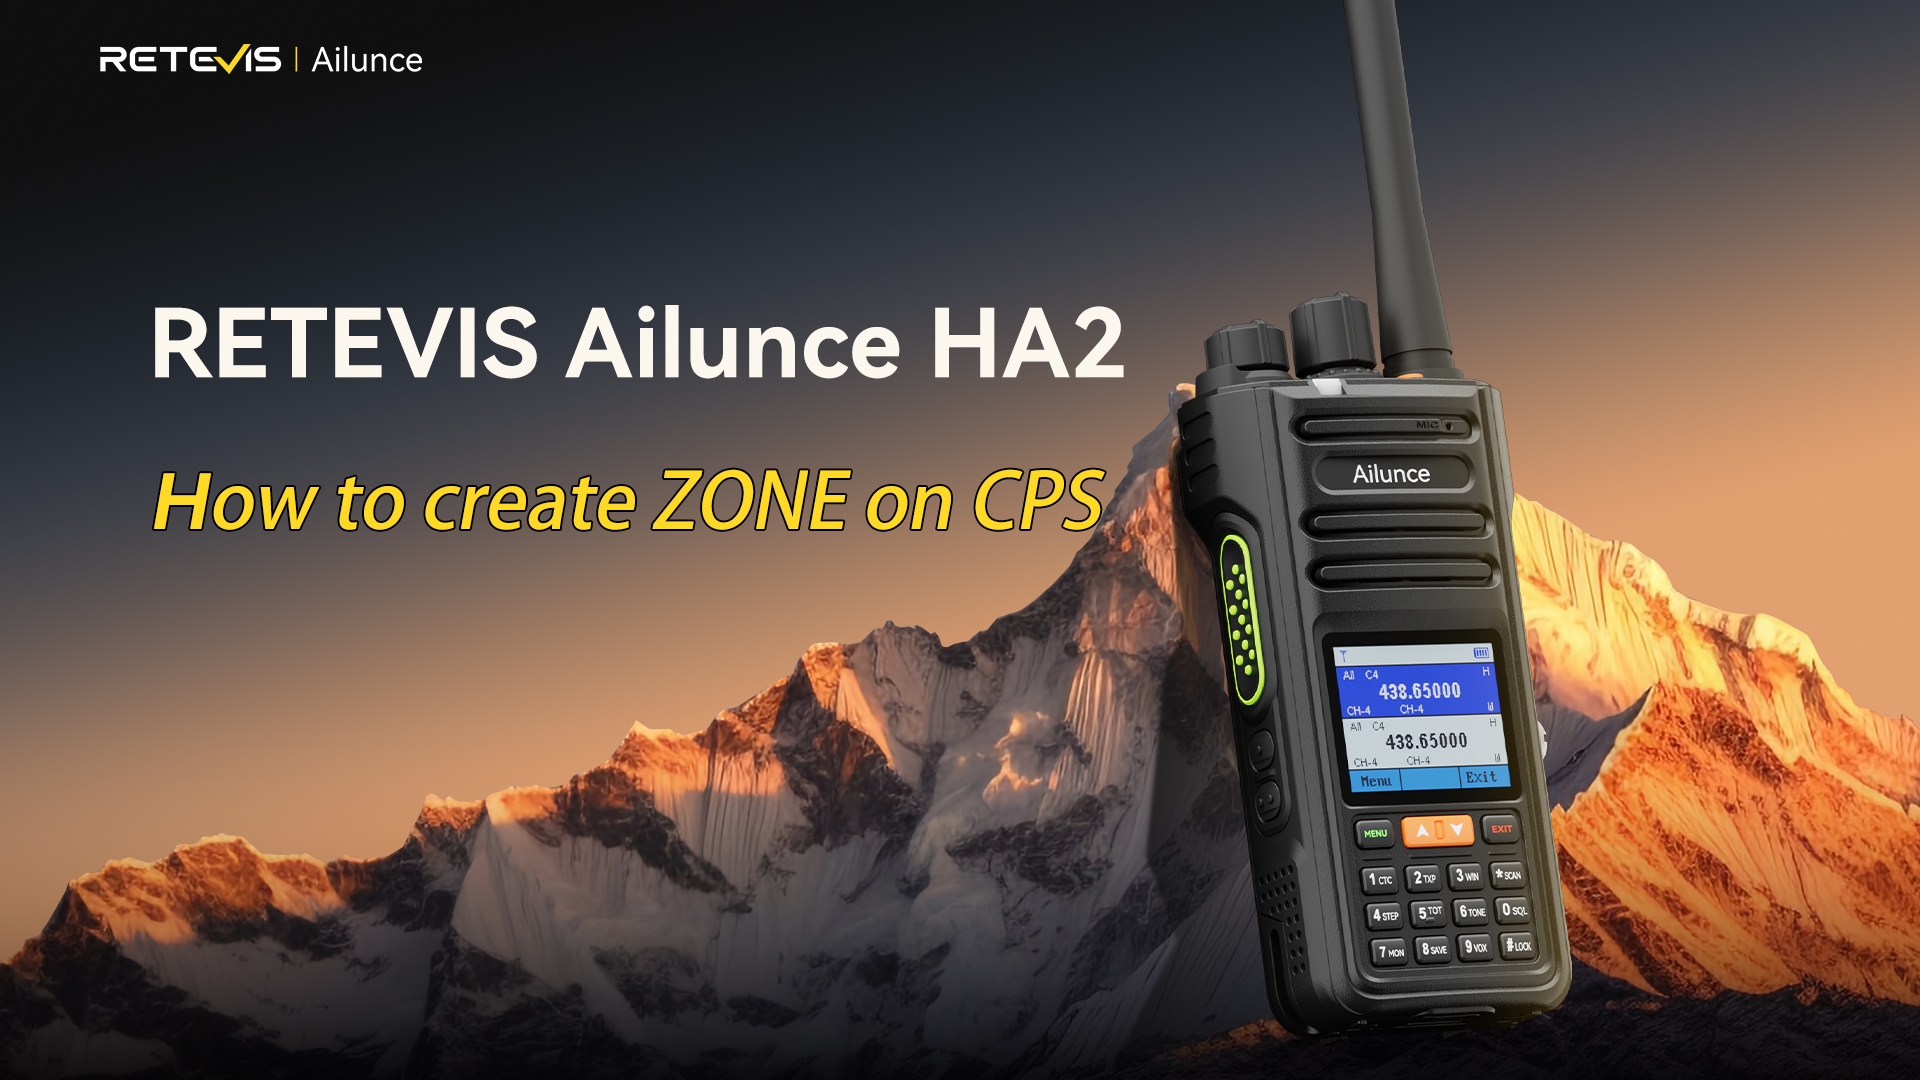
This guide walks you through setting up zones in CPS for your RETEVIS Ailunce HA2. Zones let you create custom groups of channels, so instead of scrolling through one long master list, you see only the channels you need at the moment.
Think of it like a music app: all your songs stay in the library, but a playlist gives you quick access to your favorites. Zones work the same way — channels remain in the main list, while each zone shows just the ones you want right now.
What You’ll Need
- Your RETEVIS Ailunce HA2 radio
- A programming cable
- CPS software installed on your computer
- The correct driver for the cable
-
Step 1: Connect the Radio to Your Computer
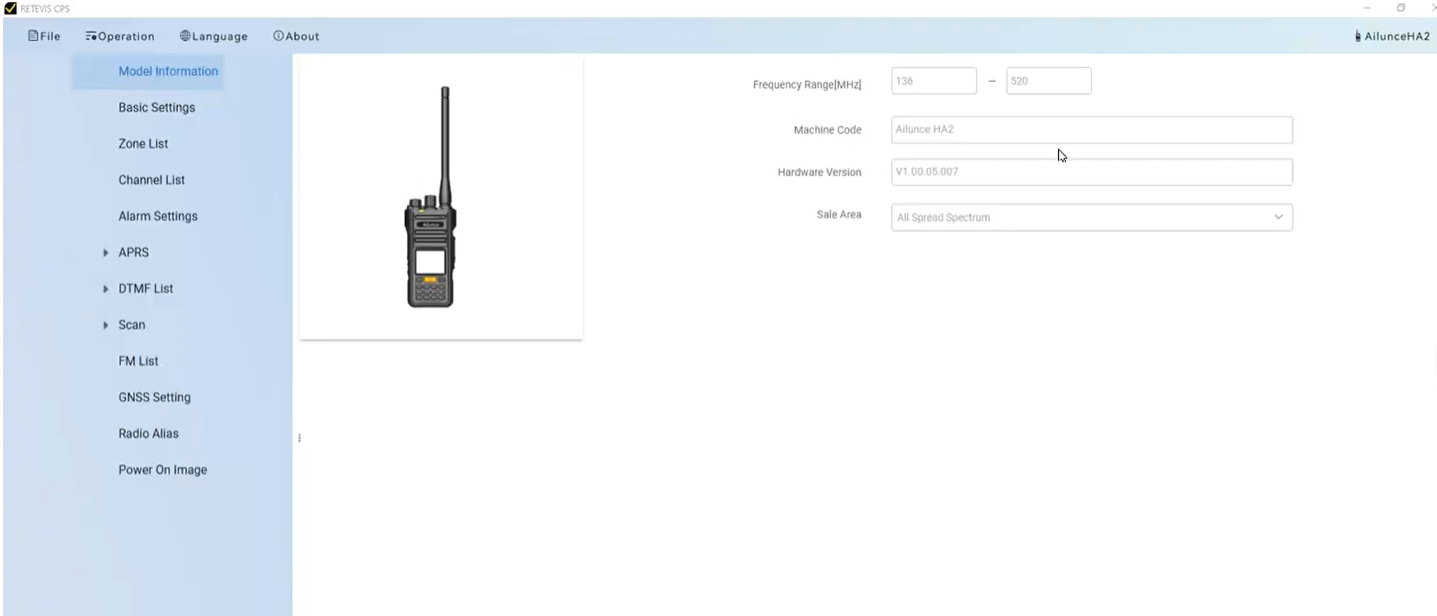
Plug the programming cable into your radio and a USB port. Launch the CPS software. The main screen will display basic information about your device, confirming that the connection is successful.
Step 2: Open the Channel List
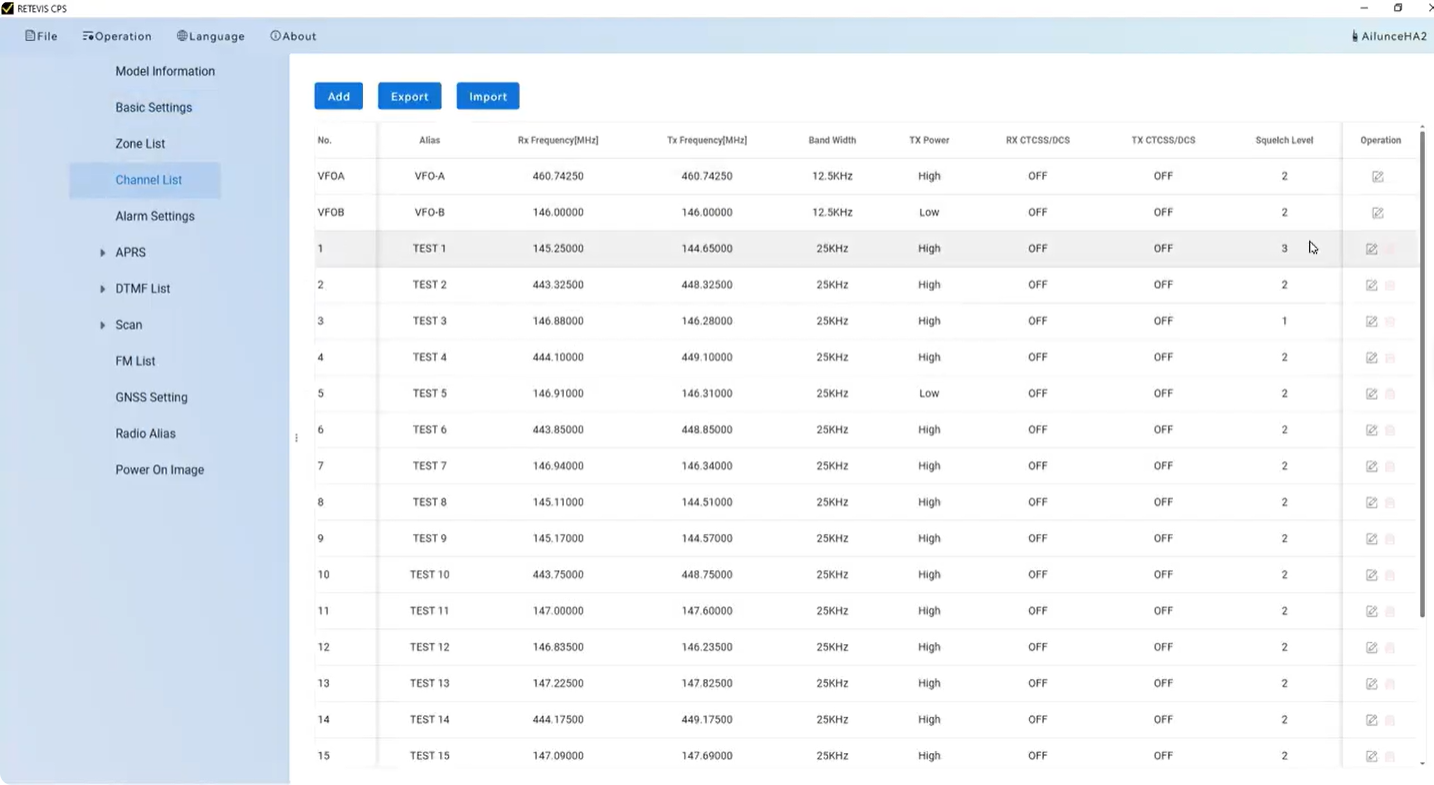
Click the “Channel List” button. This is your full channel library, containing all programmed channels: names, frequencies, tones, and other settings. Every channel you plan to use must exist here before creating a zone.
Step 3: Go to the Zone List
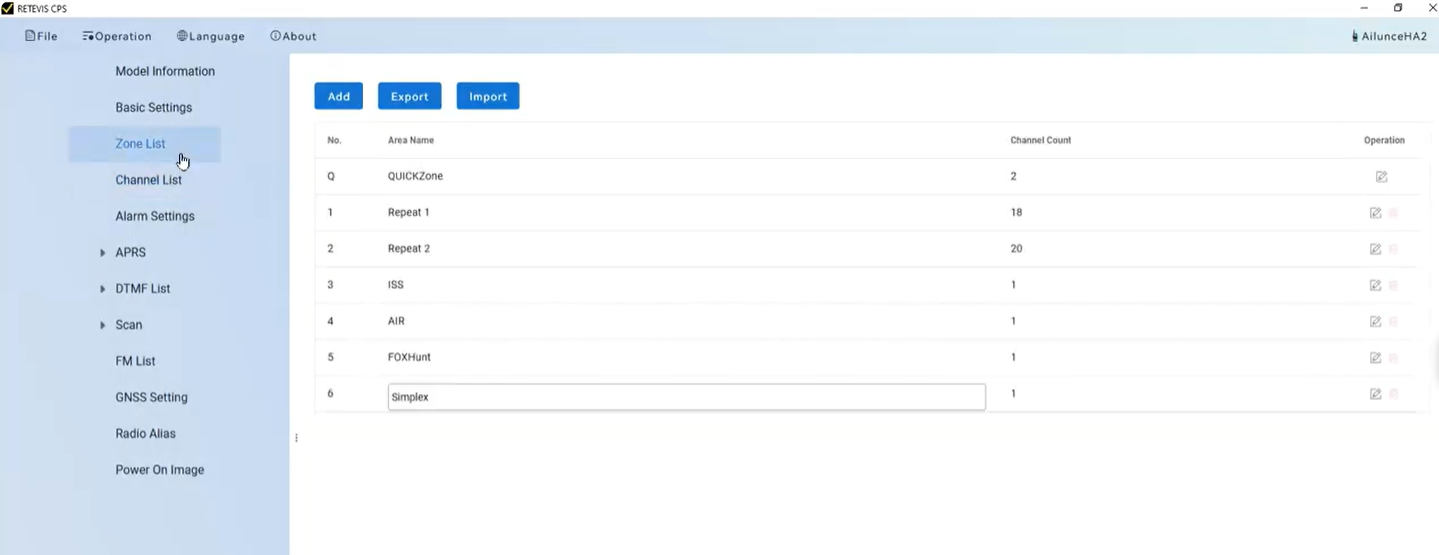
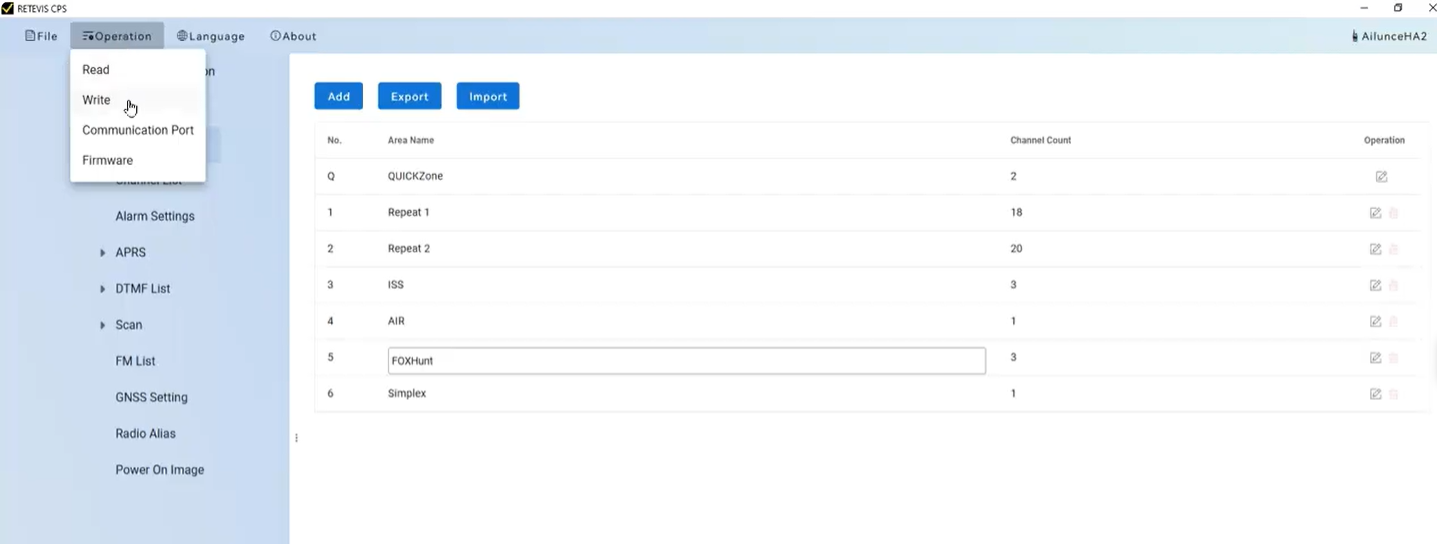
Next, click “Zone List.” A zone is a handpicked group of channels from your main list. On the radio, you can switch quickly between zones, so only the channels you need for the moment are visible.
Step 4: Edit Your Zone Names
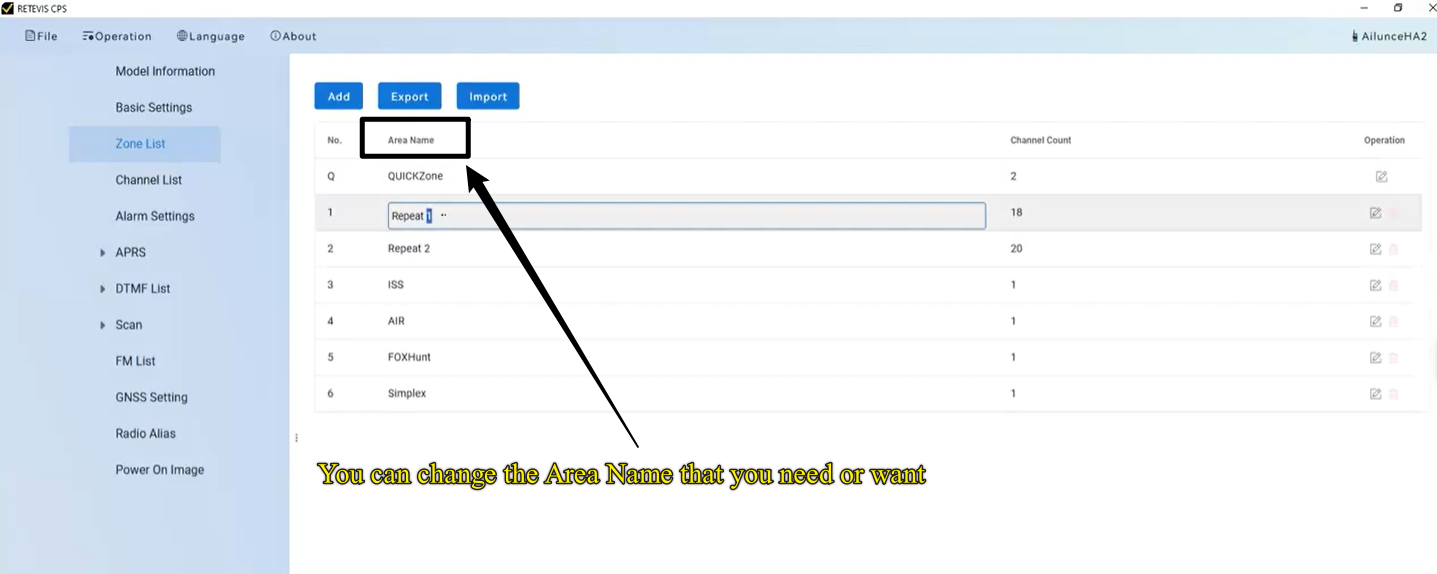
Type names that reflect how you use the channels. Examples include:-
Local repeaters
-
Simplex calling
-
Airband monitoring
-
FOXhunt frequencies
-
Travel channels
-
…or any group of channels you need or want
Keep names short — the radio screen shows only a few characters.
Step 5: Add Channels to a Zone
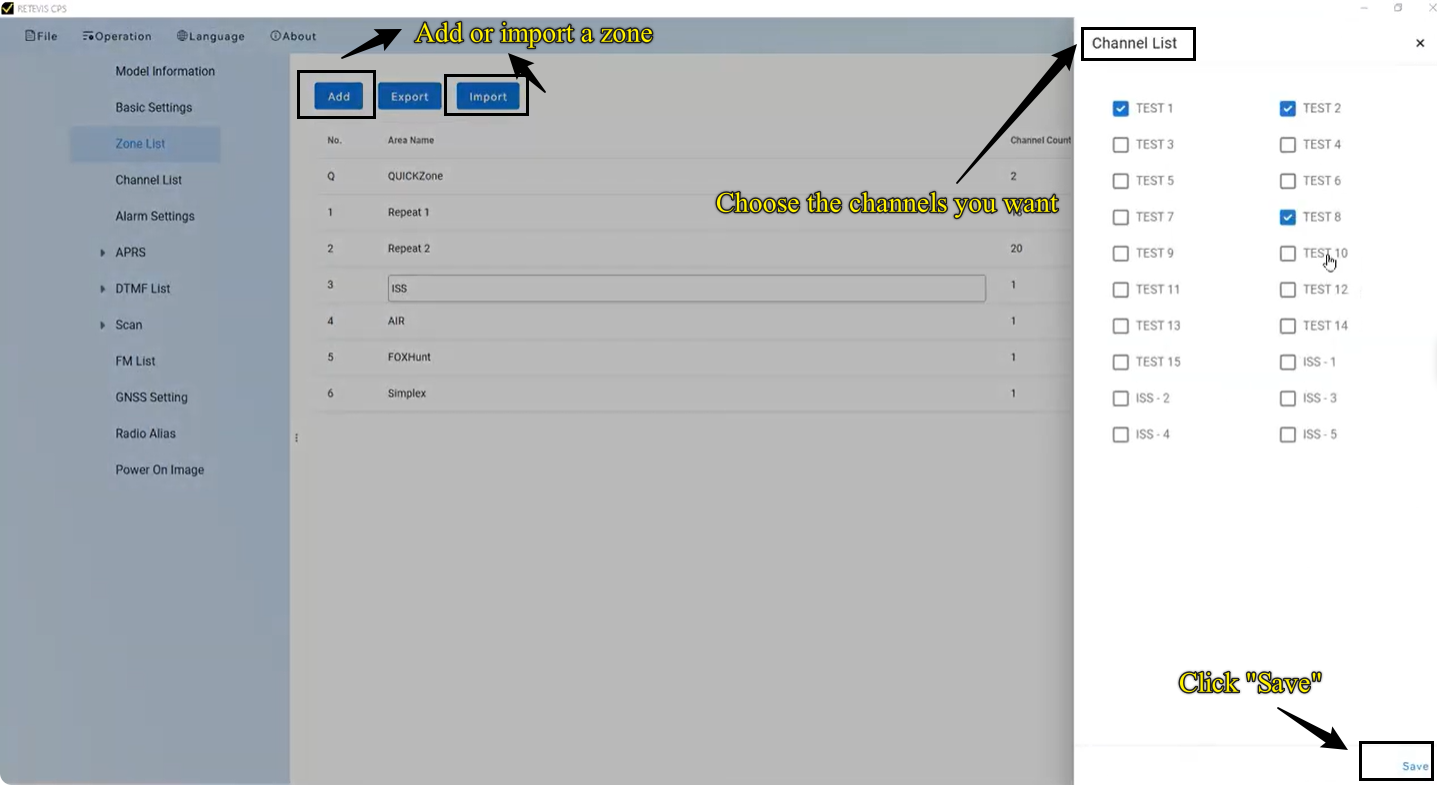
Once you have created a zone, you can easily add or remove channels based on your needs. This makes it fast and convenient to keep your radio organized exactly the way you want.To add channels:
-
Click the pencil icon next to the zone you want to edit.
-
Select the channels you want to include in this zone. You’ll see a list of all your saved channels with checkboxes — simply check the ones you want to add, and uncheck any you want to remove.
-
Click Save to confirm your changes.
You can repeat this process for any zone. A single channel can appear in multiple zones, giving you full flexibility to organize channels by activity, location, or frequency type.
Step 6: Write the Data to Your Radio
Click “Write” to send your zone layout to the device. Wait until the progress bar completes — do not disconnect the cable during this process.
Step 7: Test Your Zones
Unplug the cable. Press the Zone button or access the zone menu on your radio. Your new groups should appear. Selecting a zone displays only its channels, making navigation faster and easier.
Why Zones Are Helpful
Zones save time by giving you quick access to frequently used channels while keeping your master list intact. When moving between locations or activities, simply switch to the relevant zone, and only the channels you need are visible.
Use these steps any time you want to rearrange your channels. For more radio programming help, check the software’s help file or visit online radio groups.
-