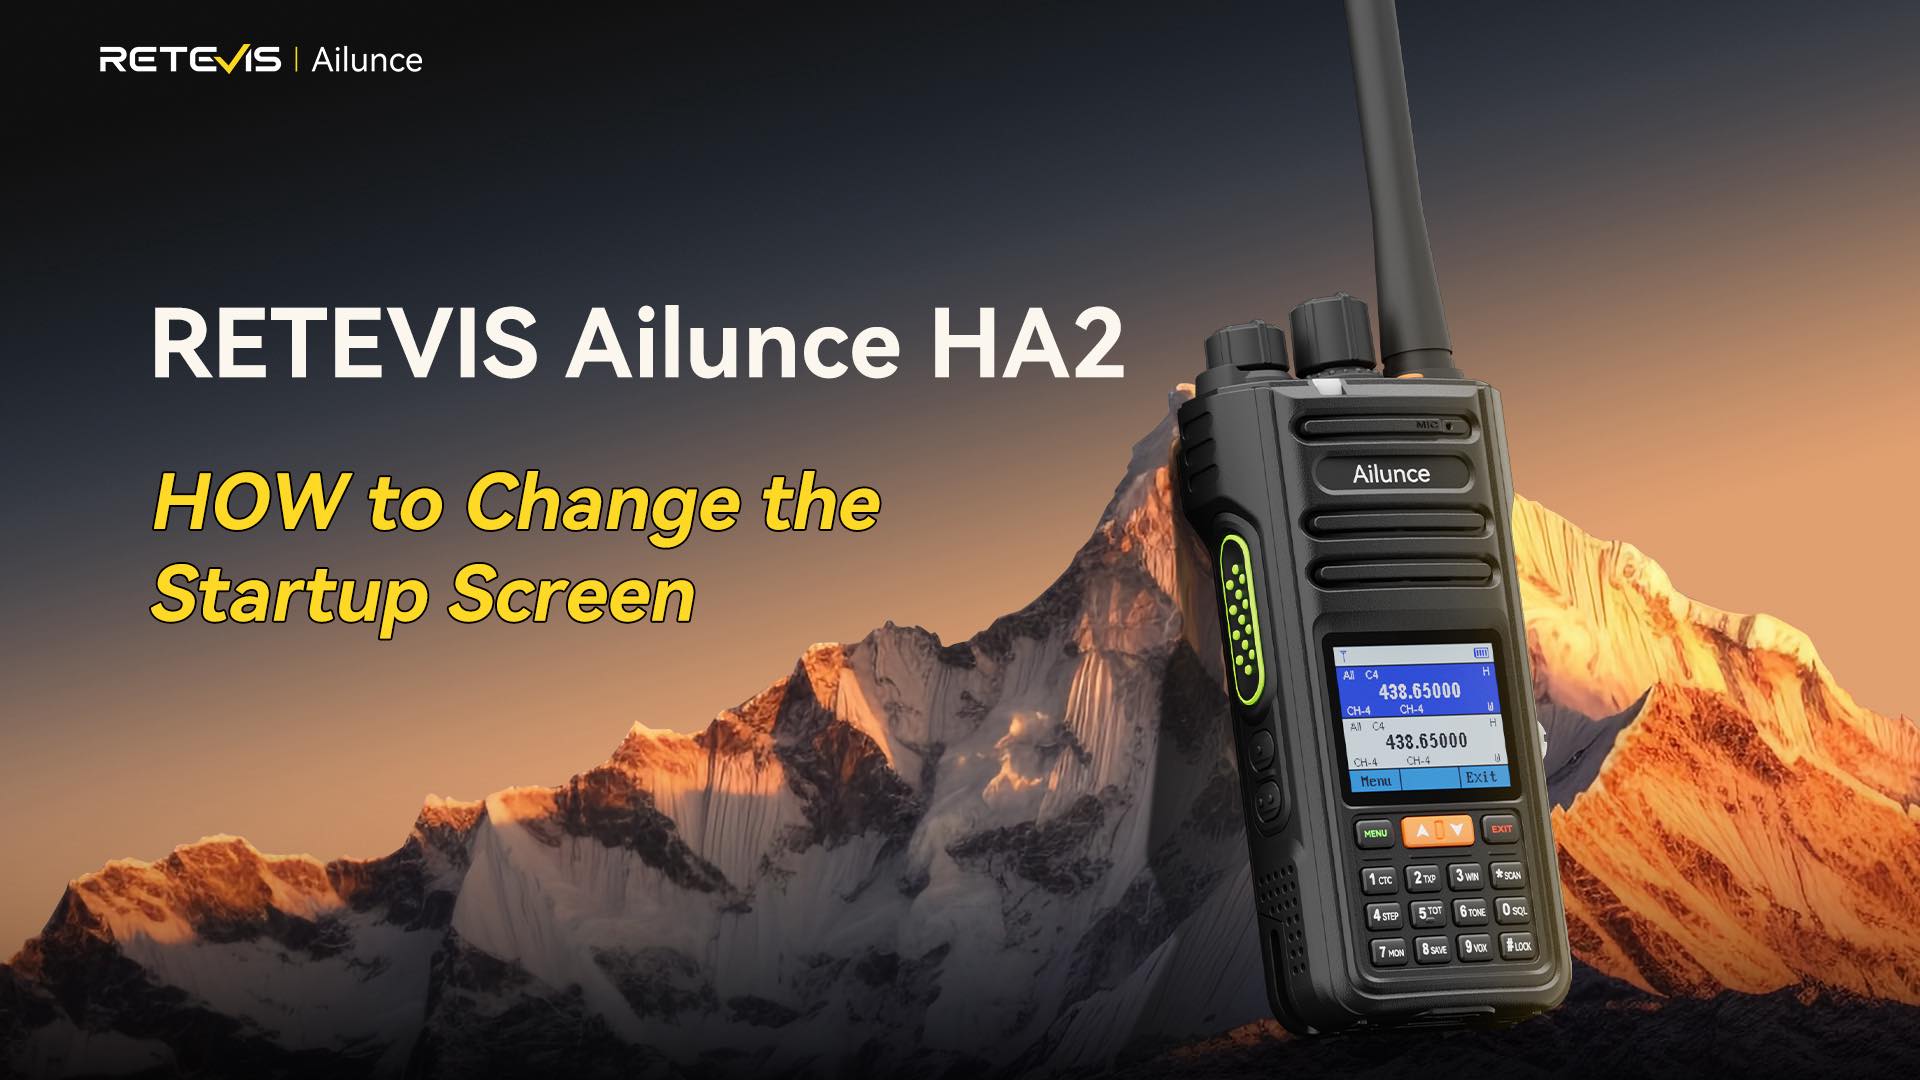
reate a Custom Startup Image on Radio That Stands Out
3 minutes is all you need to give your RETEVIS Ailunce HA2 a unique look that no one else has. This guide works for complete beginners and experienced hams alike.
Every RETEVIS Ailunce HA2 comes with the same default startup screen. There is nothing wrong with it, but it does not say anything about you. A custom startup image on radio lets you put your call sign, club logo, favorite photo, or any design you want right where you see it every time you turn on your radio.
At club meetings, field days, or hamfests, your radio will stand out from the crowd. No more picking up the wrong radio by mistake. Many clubs also use custom screens to identify team members during events.
What You Need Before You Start
You do not need any special tools or technical skills. Just these three things:
-
Your RETEVIS Ailunce HA2 radio
-
A programming cable
-
RETEVIS CPS programming software (free download from the official website)
You can download the latest CPS software for RETEVIS Ailunce HA2 here: RETEVIS Ailunce Resources Center
Step-by-Step Guide to Change Startup Image
This process is very simple. Follow these steps exactly, and you will have your new screen working in no time.
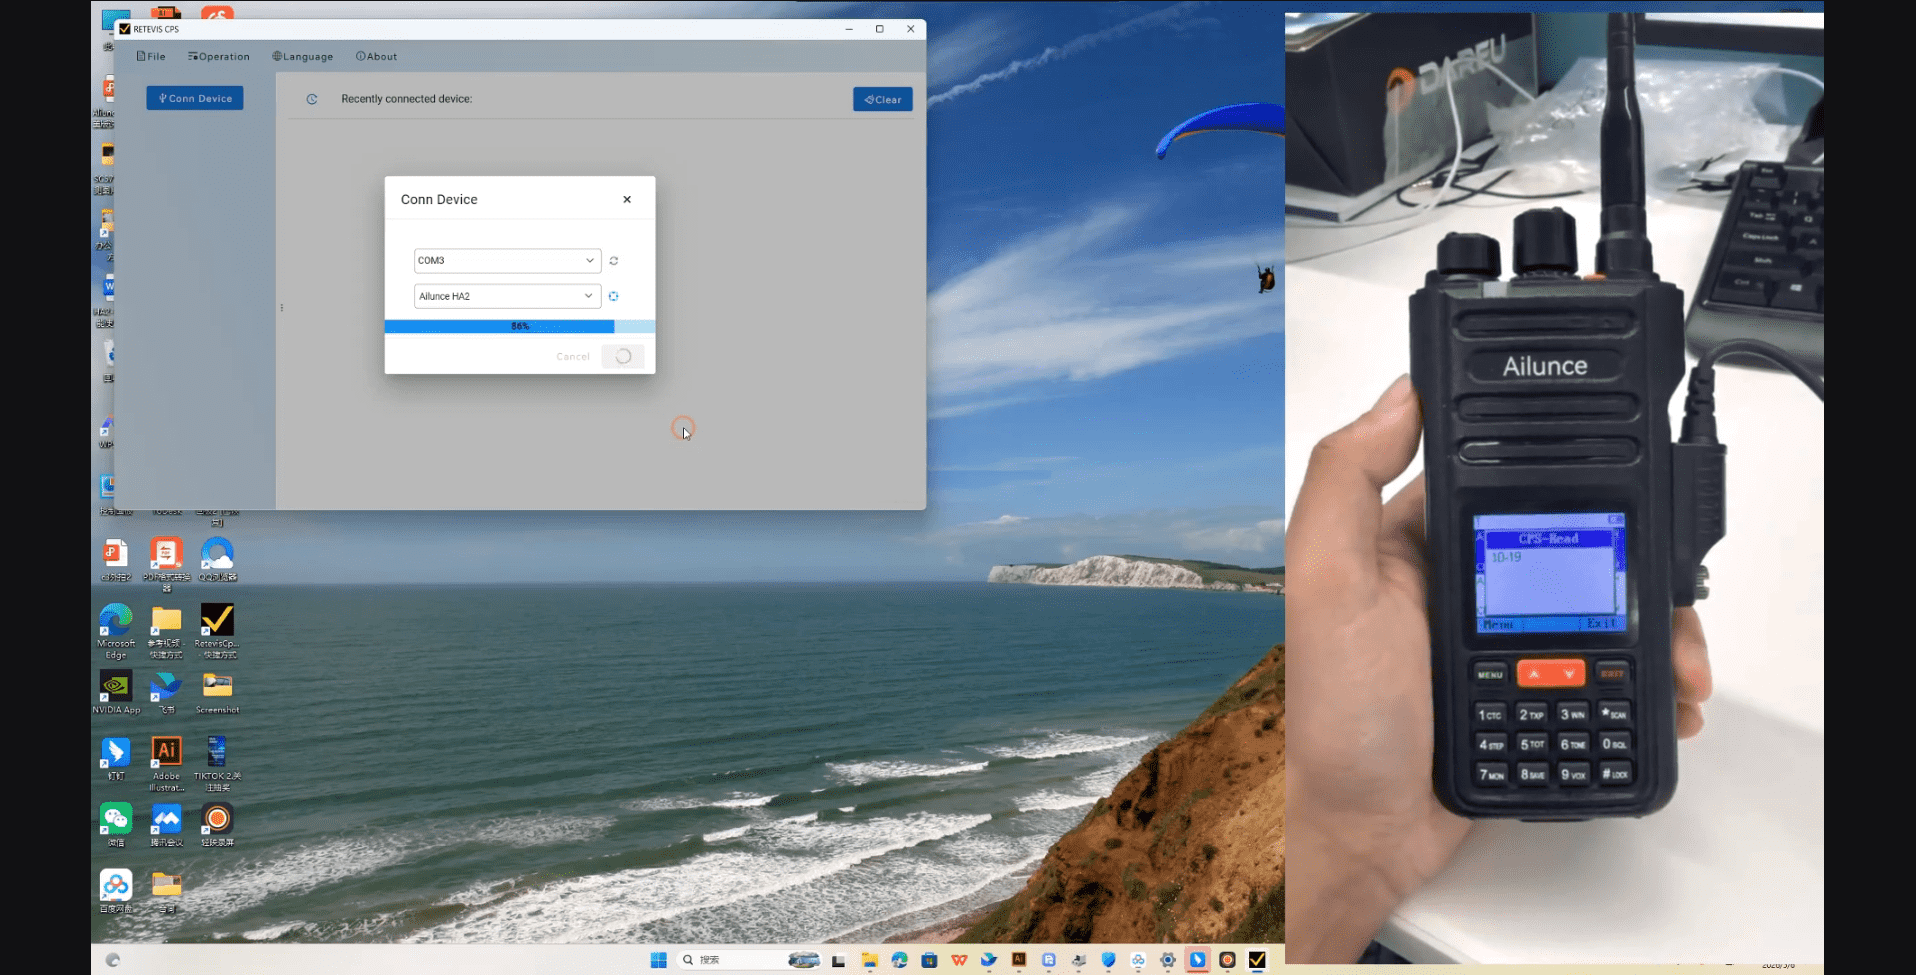
Step 1: Connect Your Radio to CPS
First, turn on your RETEVIS Ailunce HA2. Plug one end of the data cable into your radio and the other end into your computer. Open the CPS software.
If you have never connected your radio to CPS before, follow this detailed guide or click the link: How to Connect RETEVIS Ailunce Radio to CPS Software

Step 2: Find the Power On Image Setting
Once your radio is connected and the CPS software recognizes it, look for the "Power On Image" option in the menu. Click on it to open the image settings page.
Step 3: Prepare Your Image Correctly
This is the most important step. Most problems happen because people use the wrong image format.
Your image must meet these exact requirements:
-
Size: 160 pixels wide by 128 pixels tall
-
Format: PNG or WebP
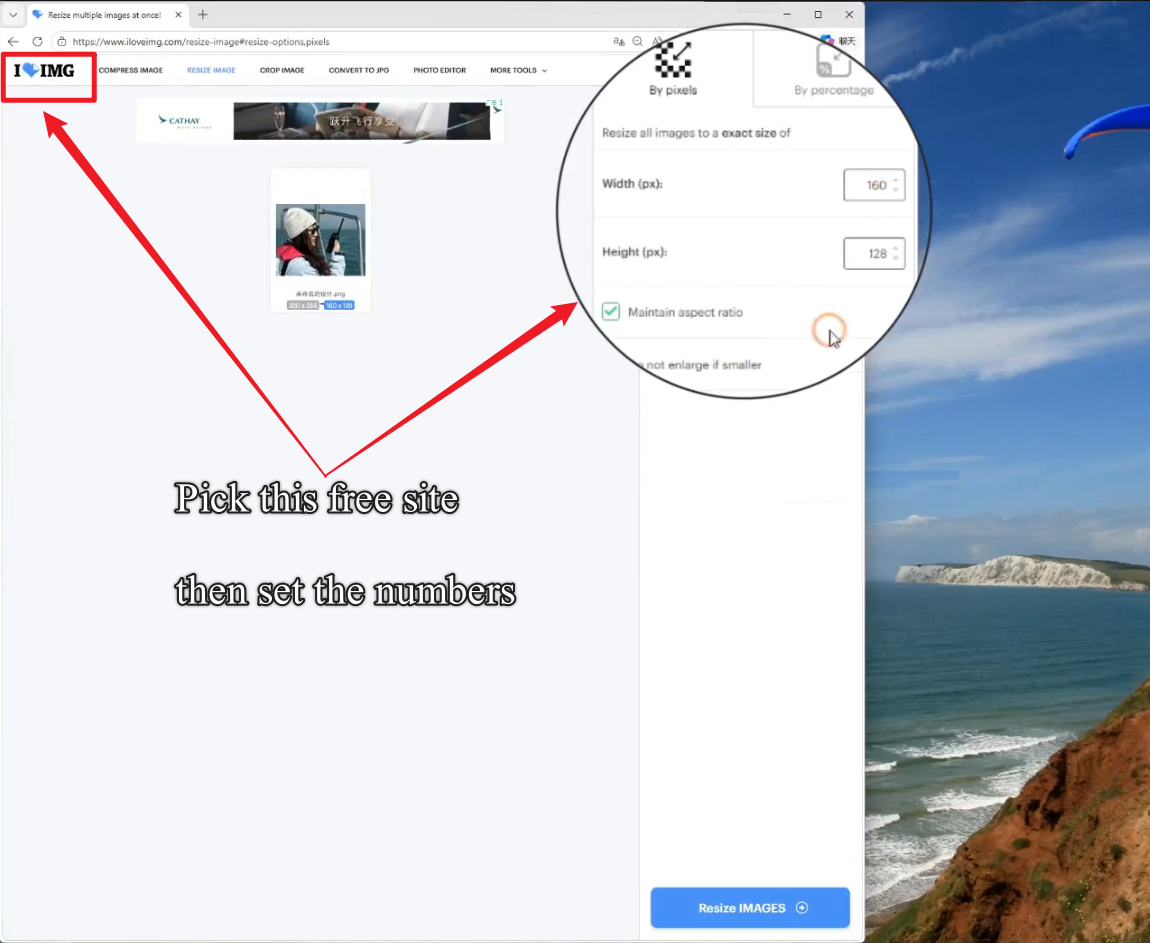
You can use Photoshop, GIMP, or any other image editor to resize and convert your picture. If you do not have any editing software, use this free online tool: ILoveIMG Resize PNG
This tool will automatically adjust your image to the correct size and format. It works on any computer and does not require any downloads.
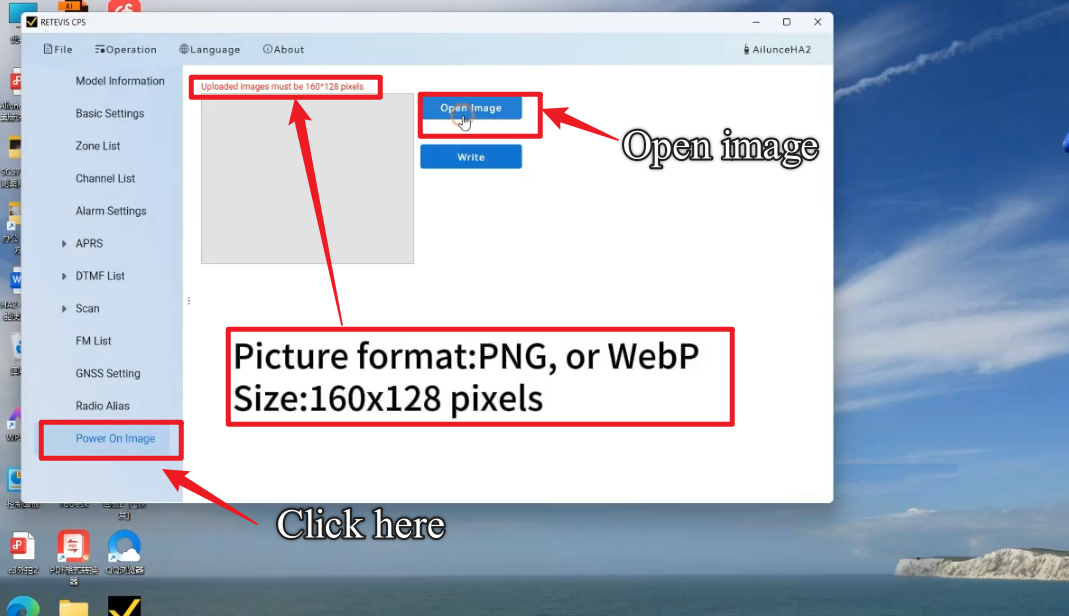
Step 4: Upload Your Image
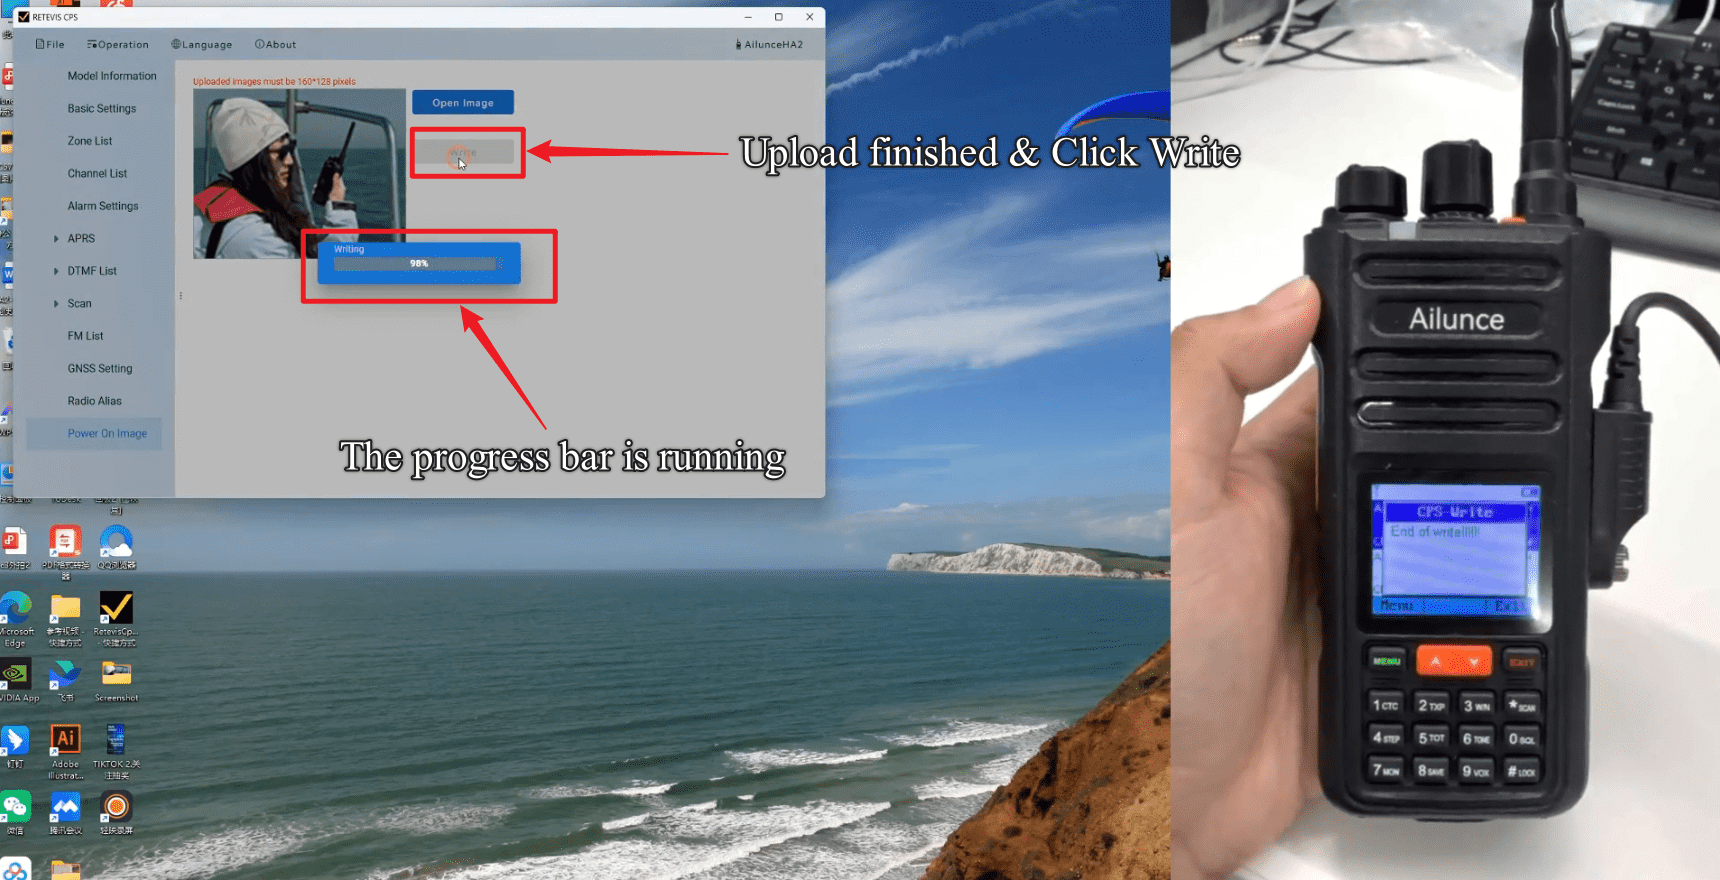
Once your image is ready, go back to the CPS software. Click the "Open Image" button. Find the picture you just prepared on your computer and select it.
You will see a preview of your image in the CPS window. Check that it looks clear and fits the screen properly.
Step 5: Write to Your Radio and Restart
When you are happy with the preview, click the "Write" button to send the new image to your RETEVIS Ailunce HA2. Wait for the process to finish. It only takes a few seconds.
After the write is complete, turn off your radio and turn it back on. Your new custom startup image on radio will appear immediately.
Common Problems and How to Fix Them
Even if you follow all the steps, you might run into one of these issues. They are all easy to fix.
My Image Will Not Upload
This is by far the most common problem. Almost always, it means your image does not meet the size or format requirements. Double-check that it is exactly 160x128 pixels.
Try using the free online converter mentioned earlier. It will make sure your image is in the correct format every time.
The Image Looks Stretched or Blurry
This also happens when the image size is wrong. Do not stretch a smaller image to 160x128. Start with a larger image and resize it down.
The Radio Still Shows the Default Screen
Make sure you clicked the "Write" button after selecting your image. The CPS software will not send the image to your radio until you do this. Also, make sure your radio stays turned on during the entire write process.
Creative Ideas for Your Startup Background Image
Now that you know how to change startup image, here are some popular ideas from the ham community:
-
Your call sign in large, bold letters
-
Your local ham club logo
-
A picture of your shack or antenna setup
-
A map of your favorite operating location
-
A funny quote or saying related to ham radio
Final Thoughts
Learning how to change default startup image on your RETEVIS Ailunce HA2 is one of the easiest and most satisfying customizations you can make. It takes just a few minutes and makes your radio truly yours.
Try it out this weekend. Once you have your new screen set up, share a photo of it in the comments below. We love seeing what creative designs the ham community comes up with.
If you found this guide helpful, subscribe to our channel for more real-world tips and tricks for your RETEVIS Ailunce radios.