+86 15093323284 hams@ailunce.com
How to set function menu of your HD1

As a novice, when you turn on the HD1 and start to set, we may meet a series of problems. Today let's learn the meaning of HD1 menu list.
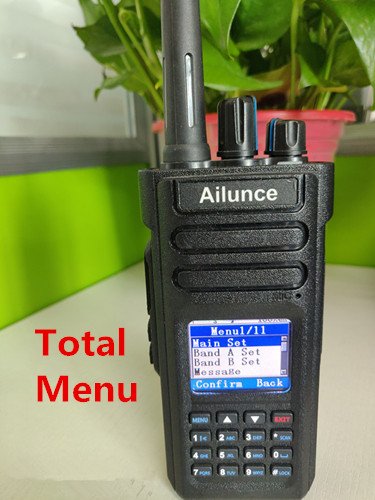
What's the meaning of the total menu list?
Let's turn on the HD1 and press the MENU key to get into the menu list. And learn the meaning of every menu list.

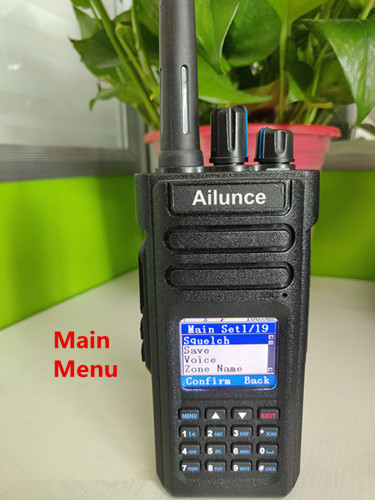
Main Set
Pressing Confirm into Main Set, there are nineteen items in the Main Set. I'll show the detail to you.
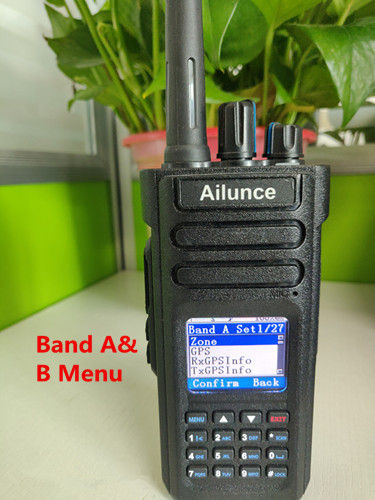
Band A Set & Band B Set
They are the primary & subsidiary band setting menu. There are twenty-seven items for every band. let's see the Band A Set menu.
Message
It's the basic function of the radio. you can write, send the message to your contacts.
Call Log
you can check all the call records.
Contacts
you can edit your contacts information, besides also manual dial them.
Radio ID
you can edit your radio id here.
FM radio
you can listen to all frequency channel of the radio broadcast.
GPS
There are all GPS information besides local & receive records.
Encryption
you can check all the encryption detail information here.
Version
you can check the version of the software.
What's the menu meaning under the main set list?

Squelch
you can select the squelch level via the up and down key, and press MENU to confirm. The higher the level, the deeper squelch.
Save
you can select the proportion of the saving via the up and down key, and press MENU to confirm. The greater the proportion of the saving, the more standby power.
Voice
you can turn on or off the broadcast voice via the up and down key, and press MENU to confirm.
Zone Name
you can turn on or off the Zone Name item via the up and down key, and press MENU to confirm.
Vox Delay
you can select the vox delay time via the up and down key, and press MENU to confirm.
Mic Gain
you can select mic gain level via the up and down key, and press MENU to confirm.
Hang Up
you can select the hang up calling time via the up and down key, and press MENU to confirm. The item is only available in digital channel mode.
Tx Channel
you can select the Tx. Channel via the up and down key, and press MENU to confirm. EDIT is transmitting by current working channel. BUSY 1~10S are transmitting by receiving the signal's channel, over the set time will be transmitted by working channel.
Key Define
It's the side key function define an item. short press SCAN key to choose side key 1, side key 2 for short and long selection, and via up and down key to select functions, pressing MENU to confirm.
Backlight
you can select the backlight time via the up and down key, and press MENU to confirm.
Key Beep
you can turn on or off the key beep via the up and down key, and press MENU to confirm.
Key Lock
you can select Manual or Auto to lock the keypad via the up and down key, and press MENU to confirm.
Ch-Mode
there are CH, NAME, FREQ display mode that you can select the channel display mode via the up and down key, and press MENU to confirm.
Scan Mode
there are T0, C0, SE scan ways that you can select the scan way via the up and down key, and press MENU to confirm.
Save CH
Pressing Back and confirm into the Save CH menu, you can select the channel that you want to save via the up and down key, pressing MENU to confirm, and via the number keys to enter the name.
Delete CH
you can delete a channel number to delete the channel data.
Roger beep
If you turn off the item the voice prompts after finishing transmit. The item is only effective in analog channel mode.
Time
Adjusting the date and clock time here. you can adjust the number via the up and down key, and press SCAN to adjust the next part.
Noise Tail
It's the noise tail elimination menu. you can turn on or off the function.
How to set the menu items of Band A Set & Band B?
They are the main channel & sub-channel setting menu. There are twenty-seven items for every band. We can set the band A and band B separately. Band A menu and Band B menu almost the same. Here we introduce the band A Set as an example.

Zone
you can select the zones that you have.
GPS
You can turn on and off the GPS function.
RxGPSInfo & TxGPSInfo
You can turn on and off the Rx & Tx GPS function.
Step
It's the frequency step setting.
Power
there are Low, Middle, High transmitting power that you can select.
Vox
It's the Vox function switch. the function will allow you to transmit a hands-free voice call at a pre-programmed radio.
Vox Level
it's the vox transmitting sensitive level selection.
W/N
It's the wide and narrow band selection. it's only effective in analog channel mode.
TOT
It's Time-Out Timer. when you exceed the time, the radio will stop transmitting although you press the PTT.
C-CDC&R-DCS&T-DCS
Press SCAN to change the CTCSS/DCS frequency, then press the up and down key to select the frequency. The items are only effective in analog mode.
Ch.Name
you can edit your current channel name. The items are only effective in analog channel mode.
Busy Lock
you can set the busy channel lockout under analog mode. Wave: if carry wave then forbid to transmit; =Code: If CTCSS/DCS codes match, then forbid to transmit; Code: if CTCSS/DCS codes don't match, then forbid to transmit.
Shift Up
you can set the frequency different direction.
Shift Freq
you can set the frequency difference.
Color Code
It's only the same color code to communication in digital mode.
Encryption Type
It's only normal and enhanced Encryption Types. The item is only effective in digital mode.
Encryption NO.
The radios can communicate that encryption type and number are all same.
DMR Mode
There are Simplex, Repeater, Double Slot working modes to select. The item is only effective in digital mode.
DMR Slot
It's the time slots selection.
Promiscuous
Turning on the Promiscuous function, any contact can be called, and if it is closed, the received contact needs to be in the receiving group list. you can refer the below blog to learn more about promiscuous.
https://www.ailunce.com/blog/hd1-promiscuous-function
Radio ID
You can select the ready radio id.
Contacts
You can select the ready contacts.
GPS Contacts
You can select the GPS contacts from the ready contacts.
Rx List
You can add from priority, local contacts to your Rx List.
Hope this blog is useful for you. any questions feel free to leave messages to us.


