+86 15093323284 hams@ailunce.com


Ailunce HD1 Quick Tips by Jeff KB5WCK

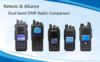
The Ailunce HD1 (GPS) is a dual band FM / DMR handheld radio with 10W / 5W / 1W power. The device can store up to 3000 channels.
The special feature of this device is the (almost) complete programmability on the device, without a code plug software.
These are still available, and it can also be preprogrammed on the PC. However, the CPS is still quite slow and has some pitfalls and mistakes.
The HD1 has 2 VFO’s which can be adjusted separately. Talkgroups / Group calls and Reflectors / Private Calls can be stored in a Priority Contacts list containing 1000 entries. In addition, the device can be equipped with a user database, with up to 100,000 users. Entries from the user database can, unlike other devices, also set as TX contacts, or RX group list contacts in the channel settings. The GPS version can also send additional Invoice GPS data to other HD1, so that you can see the distance and position of the device on the other. It is also possible to send the GPS data to specific contacts or talkgroups in a time interval, e.g. to the fire master or DMRPlus GPS service.
Unfortunately, the sent data of the HD1 GPS does not seem to be fully network compliant yet, an evaluation / display at aprs.fi is currently not yet.
Important buttons:
Exit button (Red) – Short press -> Memory / VFO switching | Long press in VFO mode -> FM / DMR switching.
Within a menu, the key is used to exit the menu.* Button – Short press -> Change VFO A / B | Long press -> Scan Start / Stop
# Key – short press -> switch single or dual VFO, with single VFO the date and time are displayed instead of the second VFO. Switching between VFO A / B is also possible in single-VFO mode with the * key.
Side buttons 1/2 – can be freely occupied via the menu. The setting is in Menu -> Main Set -> Key Define.
The change between key 1/2 Long / Short Press is done with the * key.
The change of function with arrow keys up / down.
Confirm with the Menu key, Exit (without change) with the Exit key (Red)Number keys 1-0 – In memory mode, the memory locations can be called up based on the memory location number.
For example, 0010 is entered for memory location 10 via the keyboard.
In some menus, these are also used for input of letters. This is done by repeatedly tapping the respective number, as in old mobile phones without T9 and word recognition.
Program contacts:
The device is quite simple to program without CPS contacts.
Private calls, Group calls (Talkgroups) as well as AllCall.
To do this, use the Menu key to go to the main menu, and the arrow keys to the Contacts menu item.
This is opened with the Menu button and selects Contacts again.
Now the device displays the first priority contact.
With the rotary switch you can now switch to an empty contact.
With the arrow keys you can now switch between the individual points (ID / Type / Name / City / Province / Country), with the Menu button you can change to the entry in blue and edit it.
Create the talkgroup 263333.
[1] We select the field ID with the arrow keys (highlighted in blue)
[2] We now enter the input mode with the Menu key
[3] Now enter the talkgroup number 263333 and confirm with the Menu key
[4] Now use the arrow keys to select the Type field and confirm by pressing the Menu key
[5] Use the arrow keys to select Group and confirm with the Menu key
[6] Now we change to the Name field, confirm with the Menu button and enter a suitable name under which we will find the entry later.
Exactly so one can proceed then still if necessary with the further fields.
For example, City and Country make sense for private call IDs.
Use a DMR repeater in VFO mode:
Since in VFO mode much on the device is set, this is of course at the beginning of something more extensive.
But that happens and you get used to it quite quickly.
We now assume that talkgroups are already stored in the priority contacts list.
In this example, let’s set a DMR repeater to 438.625 MHz TS1 TG262.
If you are in Memory Mode, switch to VFO Mode with a short press on the Exit button (red).
[1] On the device, we enter the desired frequency 438450 for 438.450 MHz using the number buttons. The device completes the last digits on the basis of the set grid by itself.
[2] If we are in FM mode, we switch to the DMR mode with a long press on the Exit button. In the VFO is then left DMR links, or FM mode FM.
[3] Now we open the main menu with the Menu button and change, depending on whether we are working on the upper or lower VFO on the menu BandA Set (Upper VFO) or BandB Set (Lower VFO).
[4] There we search the menu item Shift Up and choose, depending on what we want between Off, Plus and Minus. In our case we activate Minus and confirm with the key Menu.
[5] Then we go into the menu item Shift Freq and set the appropriate Shift, here 07600 for 7.6 MHz and confirm this.
[6] Continue to the Color Code menu.
Here we choose the color code suitable for the repeater, in our example 1.
The color codes can be adjusted with the Arrow up / down keys.
The correct code is confirmed again with Menu.
[7] Now go to the menu item DMR Mode.
The Simplex settings for hotspots and direct connections, Repeater for operation via duplex repeater and Double Slot for 2-slot operation on a simplex frequency are available there. The Double Slot operation works only with devices that also master this, since there is a device as “clock” for the selected Timeslot. In this mode, two QSOs can then be simultaneously routed on a simplex channel.
For our example, we select Repeater here and confirm this.
[8] Now we select in the DMR Slot menu whether we want to work on Timeslot 1 or 2.
In our example Slot 1
[9] Now we go to the menu item Contacts and select there the contact, or the talkgroup on the We want to send out. In the example DL / TG262.
[10] Now we do the same thing in the RXList menu, we also want to hear on the correct TG. Again, we now choose DL / TG262.
If necessary, we can also adjust other things, performance Low / Mid / High, Promiscuous Mode On / Off, etc.
But in order to quickly get to a “foreign” repeater, everything is set.
Since the VFO remembers the settings you can also on VFO A e.g. TS1 TG262 and on VFO B TS2 TG9 preset, and adjust if necessary only frequency and shift.
So you can quickly and easily reach the most necessary TG’s on unknown repeaters and the network independent.
FM and DMR simplex / hotspot in VFO mode
Both are very similar in themselves, like the repeater mode, only that we have to switch FM at FM with the Exit button and if necessary still set CTCSS tones, or with DMR simplex or host spot operation to the DMR mode Select Simplex and if necessary deactivate the shift.
Save channel:
Saving a channel is quite easy with the device.
If everything in the VFO is set correctly and works, just go to the menu in the menu item Main Set
There you search the menu item Save CH.
There you can select the desired memory location with the channel selector switch or the arrow keys.
Already occupied memory is displayed as CH-<memory number> , empty memory without the preceding CH-
Also, a specific memory can be selected directly via the numeric keys.
By confirming via Menu you can now enter a channel name.
Once confirmed, the channel is saved.
All memory channels created directly on the device are automatically recorded in the Scan Add and included in the Scan Add.
This can currently only be changed via Codeplug software.
Zones:
The software can also be used to define zones in the HD1.
Basically, once everything is packed into the zone All Channel, but you can further differentiate this if necessary.
Unfortunately, there is currently no way to create or change zones on the device.
Channels in the zones will continue to be displayed with their Normal Preset Number, and no zone numbering will occur.
If you set VFO A / B to a zone and start a search, only the channels in the zone will be scanned.
In the All Channel zone, All Channel those marked with the check mark Scan Add in the CPS.
Scan:
The easiest way to start the search is by long pressing the */Scan key
In the “Factory Zone” all channels marked with Scan Add searched.
Otherwise you can define different zones in which only the channels listed in the zone are searched.
The search direction can be determined by the channel selector switch.
The search function also works in the VFOs, which then cycles through all channels in the set grid.
Scanning limits cannot currently be set in the VFO scan.
Promiscuous Fashion:
In promiscuous mode, regardless of the RX list, you can hear all QSOs on a timeslot, whether it’s a foreign, unknown talkgroup or a private call.
The function can be changed via the corresponding menu item Promiscuous, in the BandA / BandB Set menu for each set channel or VFO.
Also in the CPs there is an option in the channel settings.
Reflector change:
A reflector switch does not work much differently than other devices.
The prerequisite is, of course, you are on a TG9 channel and the repeater allows a reflector change.
For example, we switch to the reflector 4044 Brandenburg.
Open the menu and go to Contacts.
Once the reflector has been saved, we continue to the Contacts menu and select the appropriate reflector.
Press the PTT key and wait until the change has been confirmed by the voice bot.
If the reflector is not stored, we can enter the reflector number by hand.
To do this, instead of going to the 2nd Contacts menu, go to the Manual Dial menu.
Here we just enter the Reflector Number, here in Example 4044 ‘via the numeric keys, and briefly press the PTT
After confirmation by the voice bot, we can speak on the reflector.
So you can quickly QRV with the device without compulsory programming on the PC, or no longer has to program lists for regions, only to then determine that you have not programmed the new, in any list listed Relay, not at all.
Even the pseudo VFO code plugs can be omitted, so that one has space for other frequencies.
Troubleshooting:
Many errors occur when signals are being received in the background while the code plug or database is being inserted.
Therefore, as with some other devices, put on a channel where nothing is received.
Should it have happened, and the device behaves strangely, just re-import the code plug.
In very persistent cases, reset the device once and initialize it completely. (Read out / save the code plug in advance!!!)
[1] Reset device: Switch on the device with the key combination <Menu> + <Exit> and select [ALL].
[2] New firmware import: Just once the current firmware re-import.
[3] Import empty user database: Import an empty user database with the CPS tool, so simply do not import contacts and click <Write>
[4] Import new user database: Now a current user database can be imported. This now quite consciously before the code plug, should write the user database, for whatever reason, in memory areas of the code plug, these are overwritten in the subsequent restore the code plug again.
It just lacks just a few user data.
[5] Reinforce code plug
Start Modes:
Flash mode: <SK1> + <PTT> + Power On
Clone Mode: <SK1> + Power On
Reset Mode (re-initialization): <Menu> + <Exit> + Power On


Raymond Lhommedieu
Does the HD1 have the AD Hock feature? Where I can just press 1 button and add a Talk Group on the fly? I think this would be a very good feature. Thanks, Ray N2XBX
Yolanda Author
thanks, now the radio has no this feature, if you want to change a Talk Group, you only can enter into menu change, and change back it later. I have record your advice when we upgrade it, we will release new firmware. 73